
Final Assembly of My Autonomous Drone Prototype
This is the final article on building the prototype version of my autonomous drone. This prototype is Created for our new start-up company, MAVRICK AERIAL. In my previous articles, I have discussed several hardware and software(mainly) technologies that are being used for the drone. You can read them here :
#URL 3
Mission / Purpose of the drone:
First, we have to understand why we are building the drone in the first place. The main purpose of this project is to create a fully autonomous drone/UAV that is being used for a safer, faster, and more efficient contactless delivery service. There are already some companies that are trying to do this. But we did notice some issues as to why this technological achievement is being delayed.
Origin of MAVRICK AERIAL:
a few months ago, I saw an article about autonomous drones being used for delivering items. The same day I received my order from Kmart. So, the seed idea was planted in my mind. “Why we can not use drones to make deliveries.”. As a big science fiction fan, I have seen similar technologies being used in these Sci-fi novels. Then I did a big further research from basic drone technology to drone-based delivery and current companies and their drone designs. I watched many YT videos as well to see these technological devices in action. After one month of thorough research and studies, I found issues of current approaches and identified three major issues. After that, I did design few initial design ideas to address these problems. Then I contacted my cousin to discuss about project and asked him to join the company. there are two main reasons for that. First, he is an electrical engineer. second, he created a drone as a university project a while ago. So, I asked him to be the CTO of our start-up although I have some knowledge of building drones and robots(Check my other articles for more information about my other projects). At the time I was living in Australia for my higher studies. So, it was hard to find the time to do this project. I had to take my first risk. I decided to come back to SL and start the project. So, I took my first risk and came back.
So, now lets dive into the building process.
Design :
Design:
initial design is to build a multi-drone system that have two or more drones.
- The larger carriage drone is for traveling between warehouse and delivery address.
- the smaller delivery drone is for delivering safer and comfortable delivery better than any other drone design by delivery companies.
So, we have to build not one, but two drone prototypes.
we did start with delivery drone since it is the most advanced drone in our multi drone system.
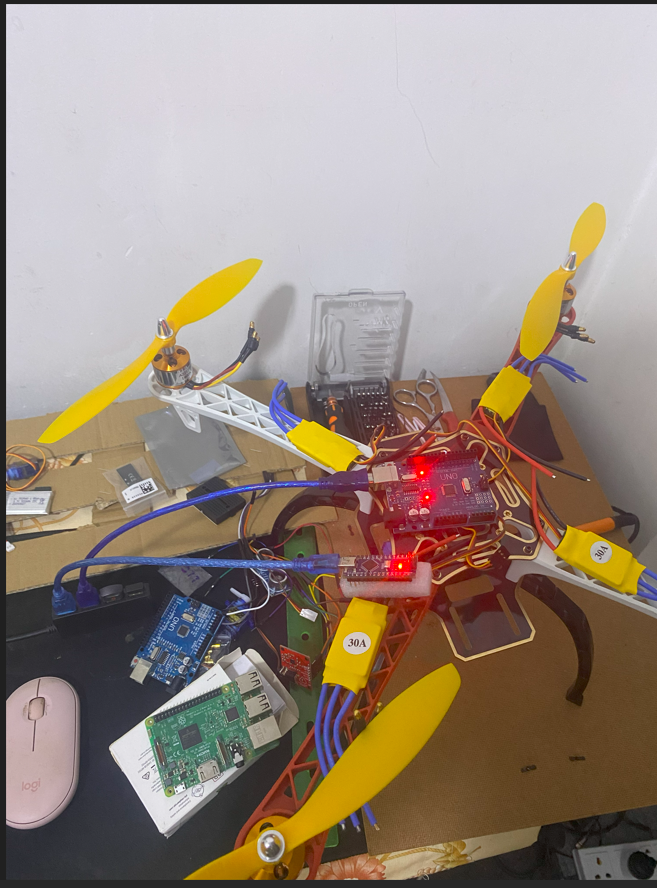
Building process :
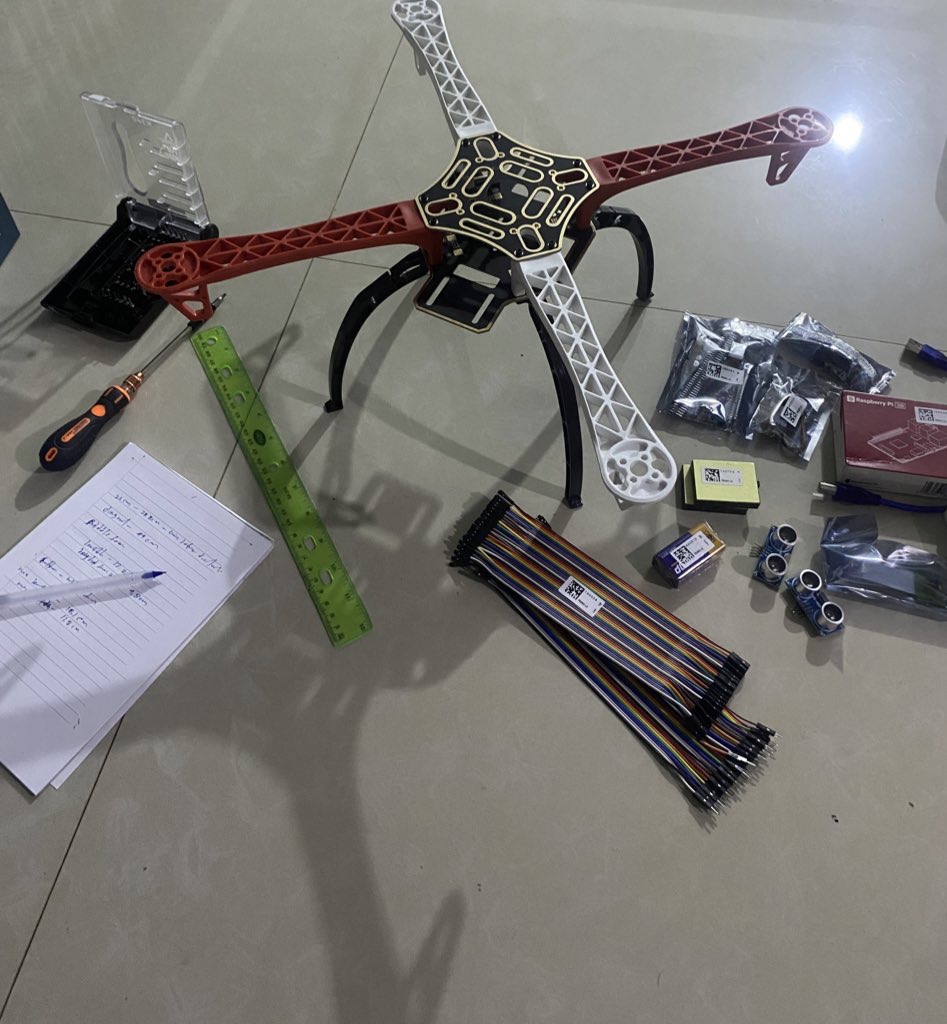
When building the drone, the main thing we must consider is the hardware. Here is the description of basic hardware components in our drone.
1. Frame:
Every drone needs a main frame to gather and hold the hardware devices in one place. The frame typically takes about 85% of the physical drone body. Also, the frame is directly involved in carrying the payload in the delivery drone. There are different frames based on the drone type. The main frame types are fixed-wing and multirotor. A fixed-wing drone fame is similar to a plane and uses a similar aerodynamic design. Multirotor frames are different by the amount of propeller rotors they have. The common designs are quadcopters(4 rotors) and hex-copters(6 rotors).
In our delivery drone prototype, we used a quadcopter design and we did choose the F450 model as seen in the figure below.

2. Flight control computer
I did write an article about flight computers and flight controllers before. if you would like to read it click here.
the primary purpose of the flight computer is to act as the brain of the autonomous drone and use the input data to guide the UAV to its next waypoint, activating the required servos, actuators,] and other control systems, and steering the aircraft in the required direction.
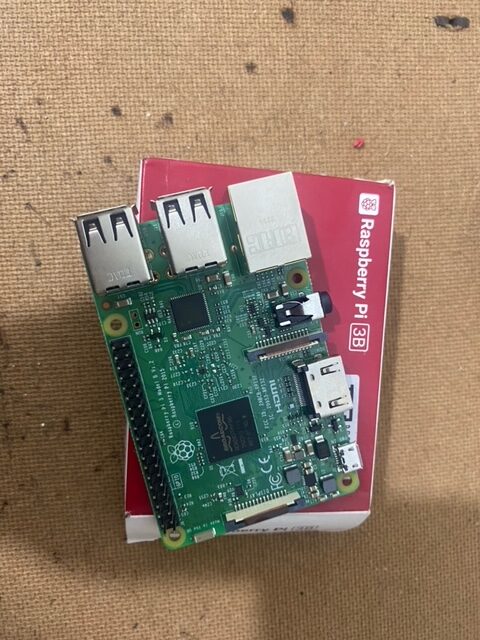
The most common computer is Raspberry Pi. There are several reasons which make raspberry pi best for our task including :
1. it is open-source
2. smaller weight and high performance
3. can use several programming languages such as Python, C++
compatible with the Ardu-pilot flight controller module.
In this prototype, we use a Raspberry Pi 3 model B since we use a camera for the drone as well. Raspberry Pi-Zero is also good if there is no camera module.
3. Ardu-Pilot Flight controller
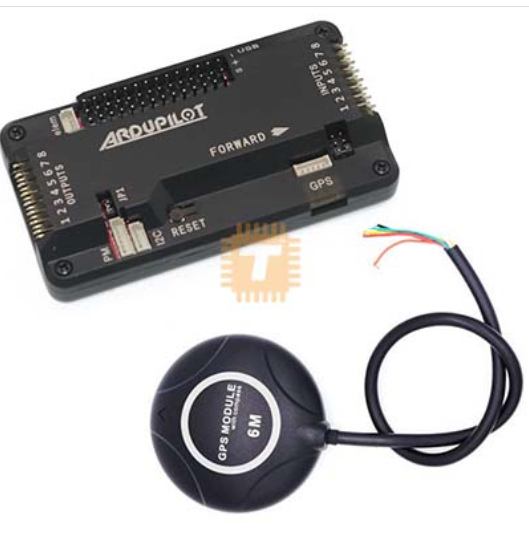
The purpose of the Ardu-Pilot flight controller is to control a vehicle, either autonomously or with pilot input, through a radio control transmitter, ground control station, or onboard computer. Ardu-Pilot is an open-source autopilot system that can be used to create and operate unmanned vehicles.
In this project, we are going to use the Ardu-Pilot flight controller with a built-in compass and connected GPS module.
4. Rotors and propeller motors
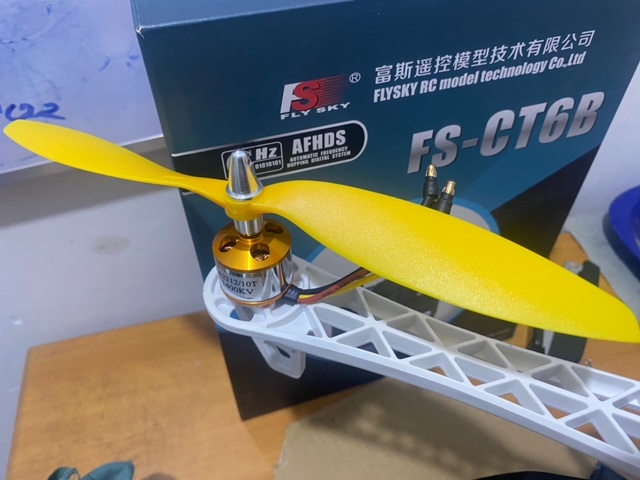
Rotors or propellers are used to create the proper aerodynamic conditions for drone operations and connected propeller motors are used to generate kinetic energy by converting electricity.
Since our drones carry an extra payload(delivery package), we need more lift. To create more lift, the thrust force generated by the rotors must be larger. So to do that, we need large rotors and a powerful motor with a larger RPM(round per minute). So we use 10-inch (28cm) diagonal rotors.
to generate better thrust force, we use 4 – 1200KV brushless motors.
5. Ultrasonic sensors :
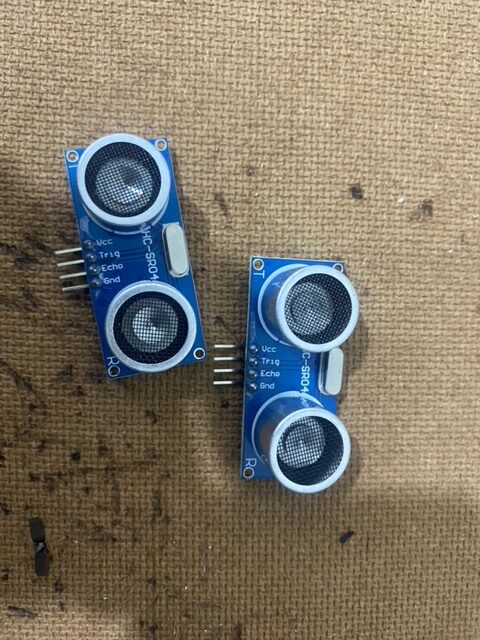
Ultrasonic sensors are primarily used to detect objects from a distance. They can generate the input data to avoid obstacles. avoiding obstacles is one of the main programs in our autonomous system.
6. Camera :
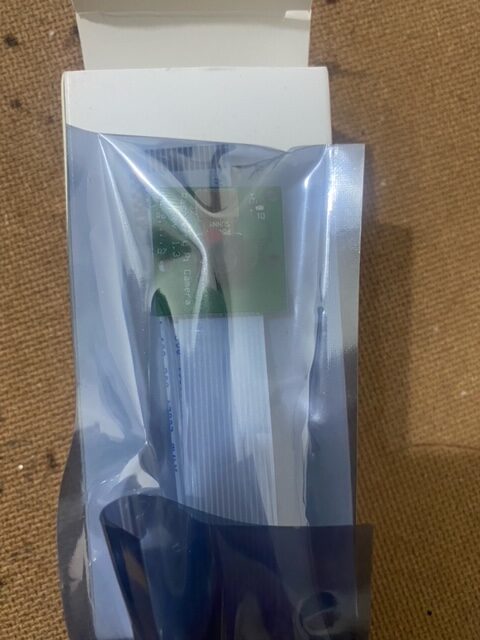
since our operations will involve long distances, we need to understand the surroundings continuously by using visual inputs. So, we are using a Raspberry Pi camera module for that task and other secondary purposes such as real-time object detection and recognition.
7. Electronic Speed controller (ESC) :
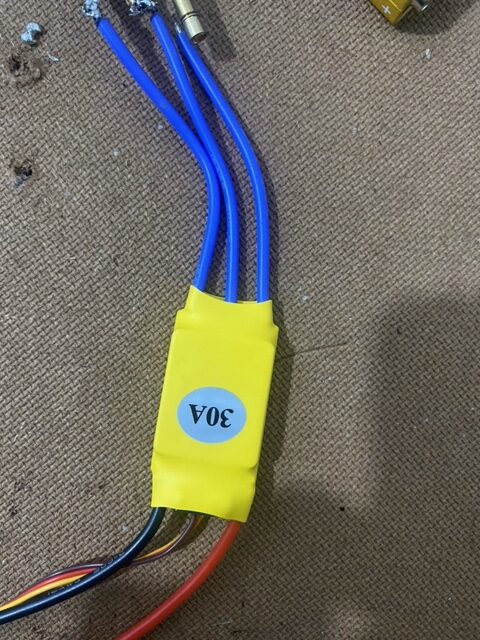
Speed controllers control the motors and connected items such as rotors. We can control the drone speed by sending input signals to speed controllers. Since we use 4 motors, we need 4 speed controllers(1 ESC per motor) as well.
8. Arduino microcontroller board(optional) :

Arduino is a good hardware and software system that can be applied for prototyping. So, Additionally, we can use Arduino microcontroller boards such as Mega, and Uno. Specially they can be programmed to collect input data from sensors and create output data signals for actuators.
These are the essential and basic hardware structures for our prototype. But since this is an Autonomous drone, we will also use some other hardware.
You can watch the making process and other related videos by clicking this link on YouTube.
We will be able to perform the full performance before the 14th of November 2024.
We continuously update the articles with new data while we are building and testing our prototype.