one of the most important tools in computer is Open CV. In this article, are going to explore about the open cv and its use in AI.
what is OpenCV:
simply, Open CV is a python suite or a library. OpenCV stands as one of the most widely utilized libraries in the realm of computer vision. For those embarking on a journey in this field, it is essential to gain a comprehensive understanding of OpenCV’s fundamental concepts. This library was built by an team inside Intel in 2000. The library was developed to perform functionalities including:
- Object detection and tracking
- Object recognition
- facial recognition
- anomaly detection
- image processing
- medical imaging
- Robotic development
- Surveillance
- Autonomous vehicle operating
There are several basic functionalities/features of Open CV to explore before developing advanced programs in python programming language.
but first we need to make sure that we have the perfect environment for developing programs.
Make sure we have installed the python package in computer and have an IDE(VS code) installed as well.
Then to install Open CV run following command in terminal:
pip install cv21. Read an image:
code:
import cv2

# reading the image :
input_img = cv2.imread('./input1.png')

# extract the height and width
h, w = input_img.shape[:2]

# display output:
print("Height = {}, Width = {}".format(h,w))
Result:

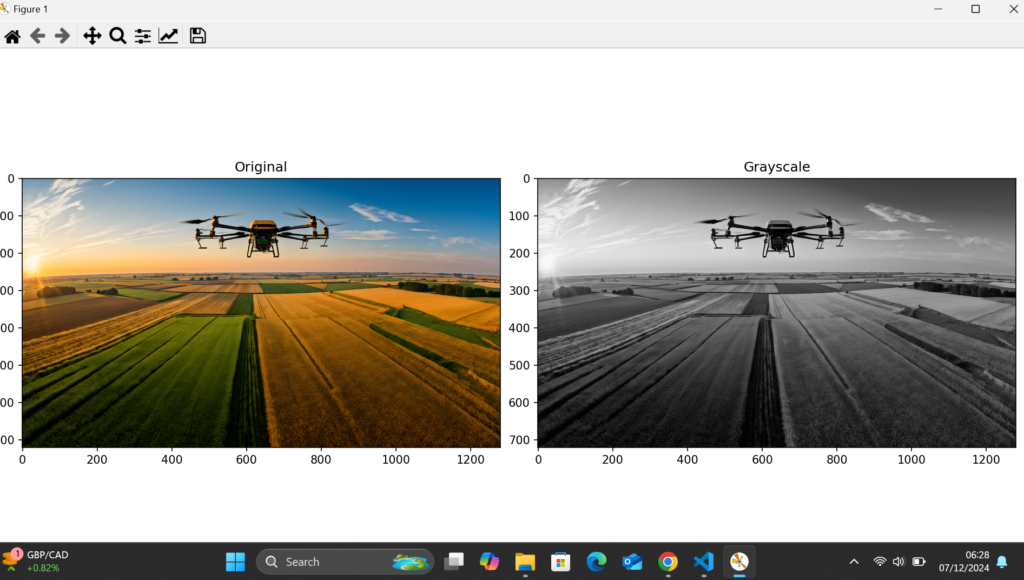
2. gray scaling:
Code:
import cv2 as cv
import numpy as np
import matplotlib.pyplot as plt

img = cv.imread('./input1.png')
gray_image = cv.cvtColor(img, cv.COLOR_BGR2GRAY)

fig, ax = plt.subplots(1, 2, figsize=(16, 8))
fig.tight_layout()

ax[0].imshow(cv.cvtColor(img, cv.COLOR_BGR2RGB))
ax[0].set_title("Original")

ax[1].imshow(cv.cvtColor(gray_image, cv.COLOR_BGR2RGB))
ax[1].set_title("Grayscale")
plt.show()
Result:

3. Image translation:
code:
import cv2 as cv
import numpy as np
import matplotlib.pyplot as plt

image = cv.imread("./input1.png")
h, w = image.shape[:2]

half_height, half_width = h//4, w//8
transition_matrix = np.float32([[1, 0, half_width],
                               [0, 1, half_height]])

img_transition = cv.warpAffine(image, transition_matrix, (w, h))

plt.imshow(cv.cvtColor(img_transition, cv.COLOR_BGR2RGB))
plt.title("Translation")
plt.show()
Result:

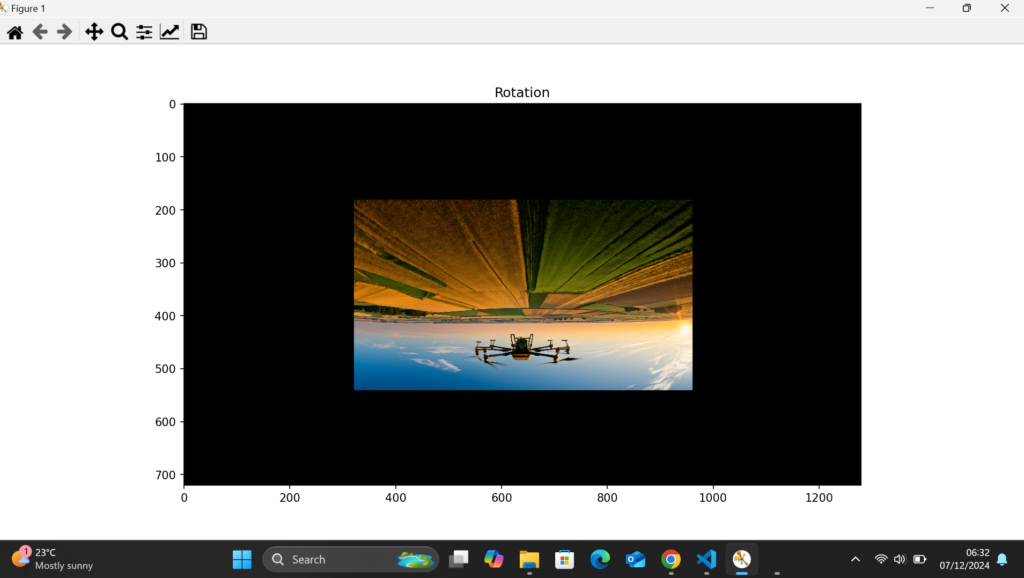
4. Image Rotation:
code:
import cv2 as cv
import numpy as np
import matplotlib.pyplot as plt

image = cv.imread("./input1.png")

h, w = image.shape[:2]
rotation_matrix = cv.getRotationMatrix2D((w/2,h/2), -180, 0.5)

rotated_image = cv.warpAffine(image, rotation_matrix, (w, h))

plt.imshow(cv.cvtColor(rotated_image, cv.COLOR_BGR2RGB))
plt.title("Rotation")
plt.show()
result:

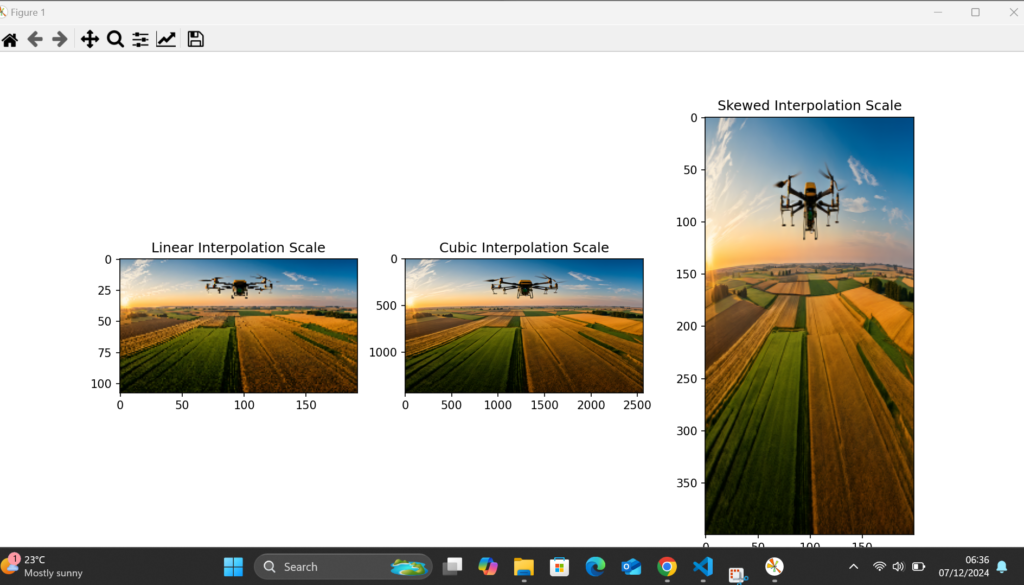
5. Image scalling:
Code:
import cv2 as cv
import numpy as np
import matplotlib.pyplot as plt

image = cv.imread("./input1.png")

fig, ax = plt.subplots(1, 3, figsize=(16, 8))

# image size being 0.15 times of it's original size
image_scaled = cv.resize(image, None, fx=0.15, fy=0.15)
ax[0].imshow(cv.cvtColor(image_scaled, cv.COLOR_BGR2RGB))
ax[0].set_title("Linear Interpolation Scale")

# image size being 2 times of it's original size
image_scaled_2 = cv.resize(image, None, fx=2, fy=2, interpolation=cv.INTER_CUBIC)
ax[1].imshow(cv.cvtColor(image_scaled_2, cv.COLOR_BGR2RGB))
ax[1].set_title("Cubic Interpolation Scale")

# image size being 0.15 times of it's original size
image_scaled_3 = cv.resize(image, (200, 400), interpolation=cv.INTER_AREA)
ax[2].imshow(cv.cvtColor(image_scaled_3, cv.COLOR_BGR2RGB))
ax[2].set_title("Skewed Interpolation Scale")

plt.show()
Result:

These are the basic tasks that can performed by using Open CV python library. But there are many more advanced features in this library to explore.
The full code (find intro to open cv article folder): https://github.com/vishwagw/computer-vision-projects.git
Referrances:
https://www.opencvhelp.org/tutorials/advanced/
https://opencv.org/university/computer-vision-and-deep-learning-applications/
