
chatbots are one of the major development in recent years. almost every website in e-commerce field is using chatbots as their main communication agent. In this article we are going to build a sample chatbot version for deploying to a website.
what is a chatbot:
Simply, a chatbot is a software application that is built to perform human-like interactions/conversations with human users via text or voice input/outputs.
most of the modern chatbots are AI-integrated and can perform intelligent conversations with users.
building a chatbot from scratch:
building a chatbot from scratch is not a simple task. you will need some experience in computer programming. there are several programming languages that can be used to build chatbots including:
- Python
- JavaScript
in this article we are using JavaScript as the major programming language while using Html as the markup language.
first, open your preferred code editor (IDE).
Then create a file called ‘bot.js’ and save it. this file contains the code for bot program. then we can apply following code as the main program.
document.getElementById("send-button").addEventListener("click", sendMessage);
document.getElementById("chat-input").addEventListener("keypress", function (e) {
if (e.key === "Enter") sendMessage();
});
const messagesContainer = document.getElementById("chat-messages");
function sendMessage() {
const inputField = document.getElementById("chat-input");
const userMessage = inputField.value.trim();
if (userMessage === "") return;
// Display the user's message
addMessage(userMessage, "user");
// Process the bot's response
setTimeout(() => {
const botMessage = generateBotResponse(userMessage);
addMessage(botMessage, "bot");
}, 500);
inputField.value = "";
inputField.focus();
}
function addMessage(message, sender) {
const messageElement = document.createElement("div");
messageElement.className = sender === "bot" ? "message bot-message" : "message user-message";
messageElement.textContent = message;
messagesContainer.appendChild(messageElement);
messagesContainer.scrollTop = messagesContainer.scrollHeight;
}
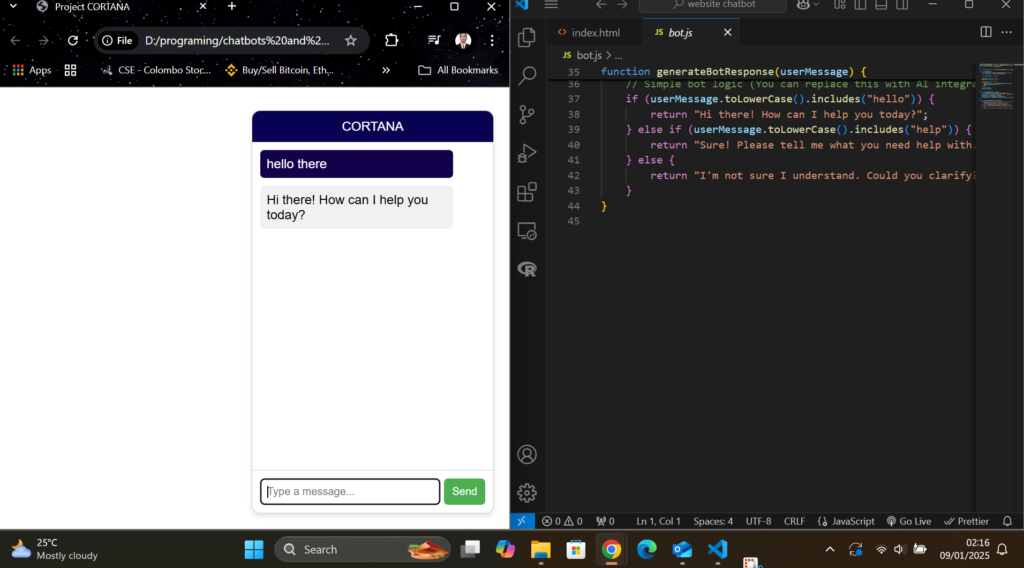
function generateBotResponse(userMessage) {
// Simple bot logic (You can replace this with AI integration)
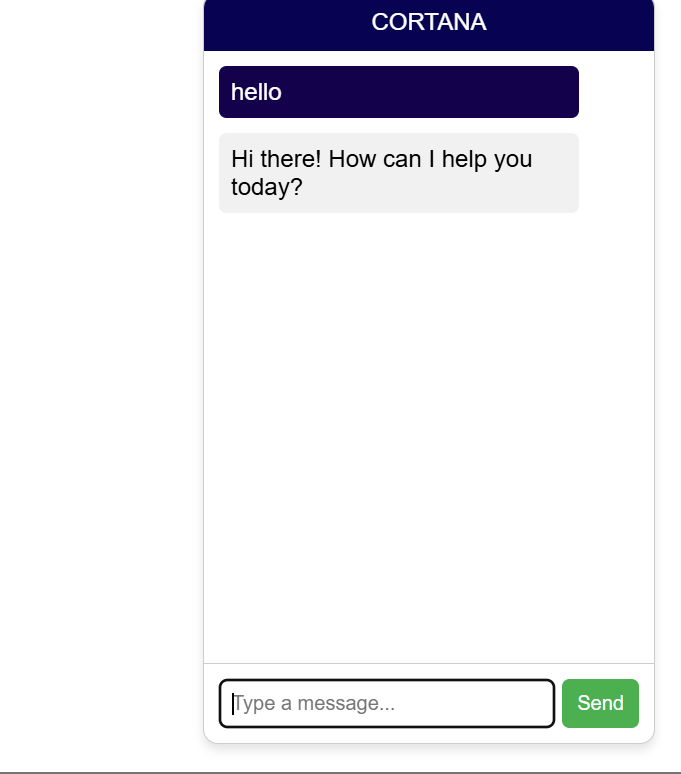
if (userMessage.toLowerCase().includes("hello")) {
return "Hi there! How can I help you today?";
} else if (userMessage.toLowerCase().includes("help")) {
return "Sure! Please tell me what you need help with.";
} else if (userMessage.toLowerCase().includes("who is vishwa")) {
return " Vishwa GW is the creator of me and this web site, He is a self thought AI and robotics researcher."
} else if () {}
else {
return "I'm not sure I understand. Could you clarify?";
}
}now lets look at the last function of the program code. The function ‘generateBotResponse’ is responsible for generating accurate responses for user inputs. For example, if user enter “hello” as the input, then chatbot will automatically generate the appropriate response for that; “Hi there! How can I help you today?”.
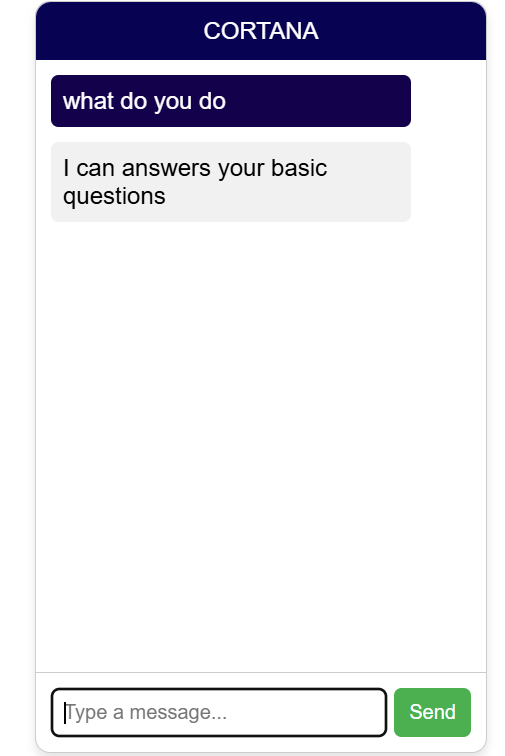
As a custom trained chatbot application type, we can add as many as user input data and their preferred responses by extending ‘ELIF’ statement.
following is a simple example for that.
 } else if (userMessage.toLowerCase().includes("what do you do?")) {
        return "I can answers your basic questions";
}
if we add this extension response to the our chatbot conversations just like below.
Although this is a custom trained chatbot, we can replace response function to AI-integrated intelligent response.